


SITE Ray Management
Definition
A secure virtual meeting and conferencing platform that provides fast and reliable and business focused meeting capabilities
Features
- Instance Creation and Management: User-friendly setup for quick instance creation
- Editing and Personalization: Options to edit instance names, logos, and welcome messages and the ability to set unique meeting URLs and add branding
- Monitoring and Analytics: Real-time monitoring dashboard for active meetings, participant count, and duration analytics on meeting frequency, average duration, and participant engagement
- Comprehensive Meeting Logs: A detailed log of all completed meetings, capturing essential data for improved oversight and tracking.
Step-by-Step Guide
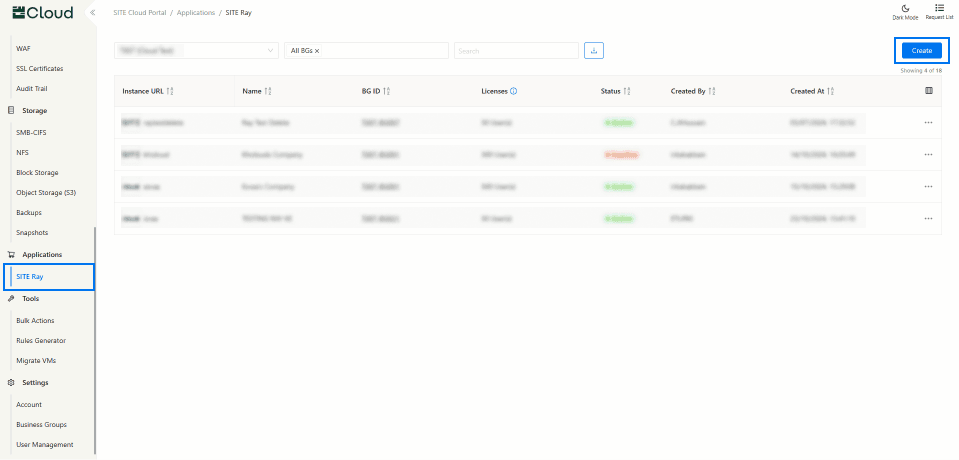
1. Access Through Applications Section: On the side menu, through Application section select “SITE Ray”
2. Create a new Instance: To create a new SITE Ray instance press Create on the top right corner.
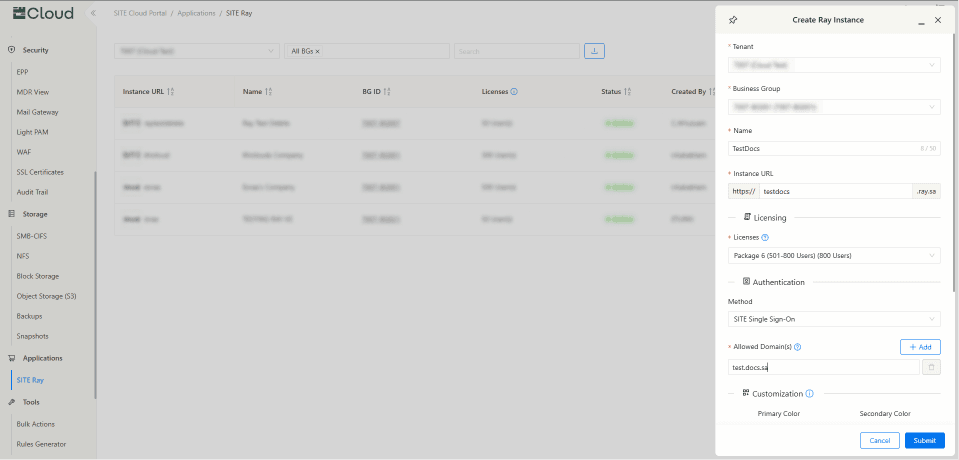
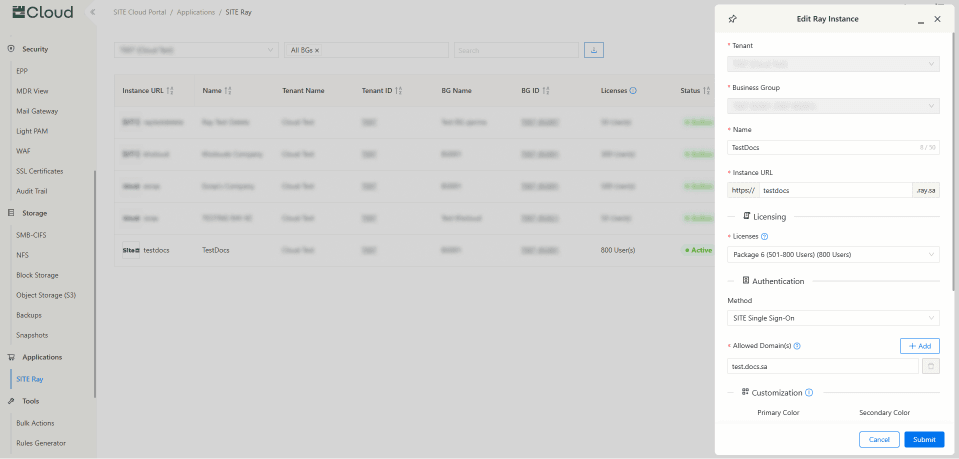
2.1 Fill in the required filed Which include:
- Configure Instance Details:
- Tenant: Select the appropriate tenant for the instance.
- Business Group: Choose the relevant business group under which this instance will reside.
- Instance Name: Provide a unique name for the instance.
- Instance URL: Specify the URL through which the customer will access their instance.
- Licensing:
- Set the number of users requiring access to the instance. Each user logging in consumes one license, but guest participants in meetings are not counted toward license consumption.
- The maximum number of licenses is 1,000. For custom licensing needs, please contact support@site.sa.
- Method:
- Choose the preferred authentication method. The options are:
- SITE Single Sign-On: Standard SITE SSO integration.
- Email OTP: Login via a one-time password sent to the user's email.
- Custom Single Sign-On: If selected, additional details are required, including:
- Mobile App Redirection Domain
- SAML Identity Provider URL
- Token Signing Certificate
- Choose the preferred authentication method. The options are:
- Allowed Domains:
- Add the desired Email Domains that are permitted for user logins, ensuring that only users with emails from these domains can access the instance.
- Customization:
- Customize the instance’s visual appearance by uploading a primary and secondary color scheme.
- Add logos for both default and dark mode to match your branding requirements.
- Note: the logo should be .png and 500x500 pixels
- Click Submit to complete creating your instance
3. Access Instance
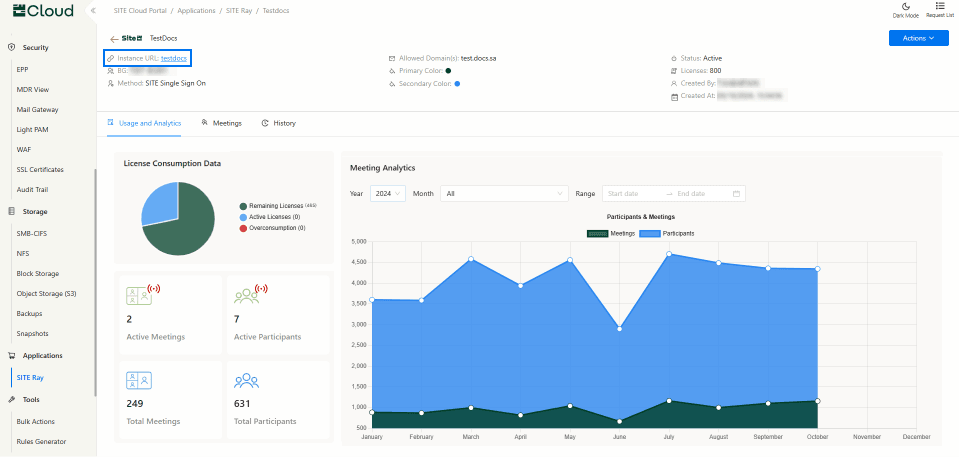
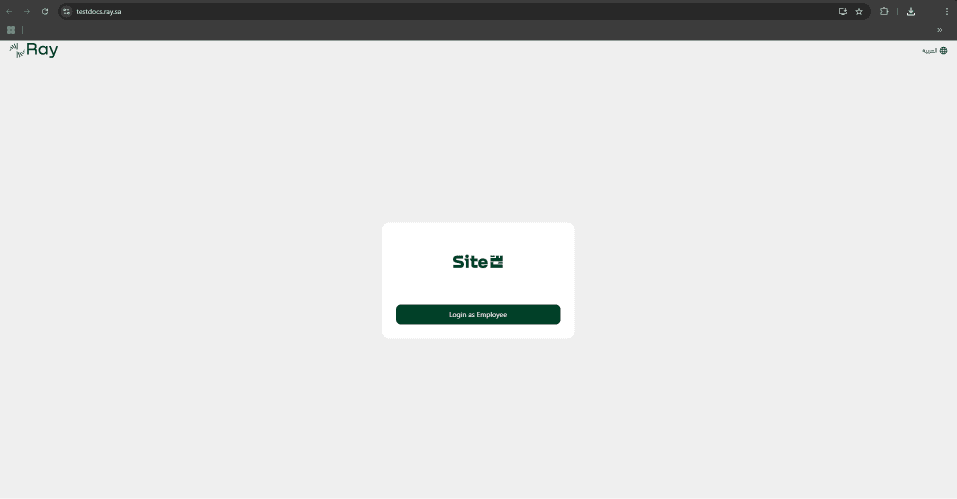
3.1 To access the instance, users can click on the Instance URL, which opens the instance directly, allowing them to begin using Ray without any additional steps.
4. Manage Instance
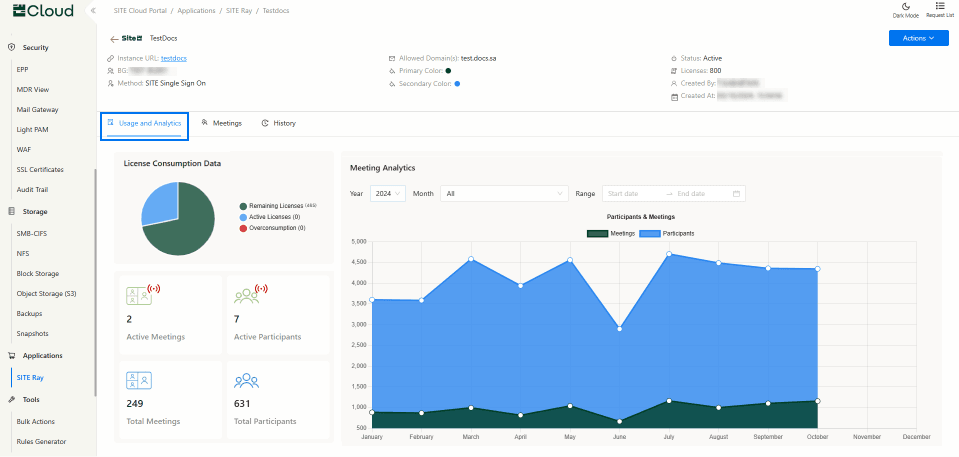
4.1 Usage and Analytics Tab: Access a comprehensive details and analytics for each instance. This includes:
- Instance Information: A complete overview of the instance's configuration, settings, and associated attributes.
- Detailed Dashboard:
- License Consumption: Visual insights into license usage, showing the number of active licenses and trends in license consumption over time.
- Activities: A log of recent activities within the instance, providing visibility into user actions and system events.
- Participants: Data on participant engagement, allowing users to monitor attendance and participation levels.
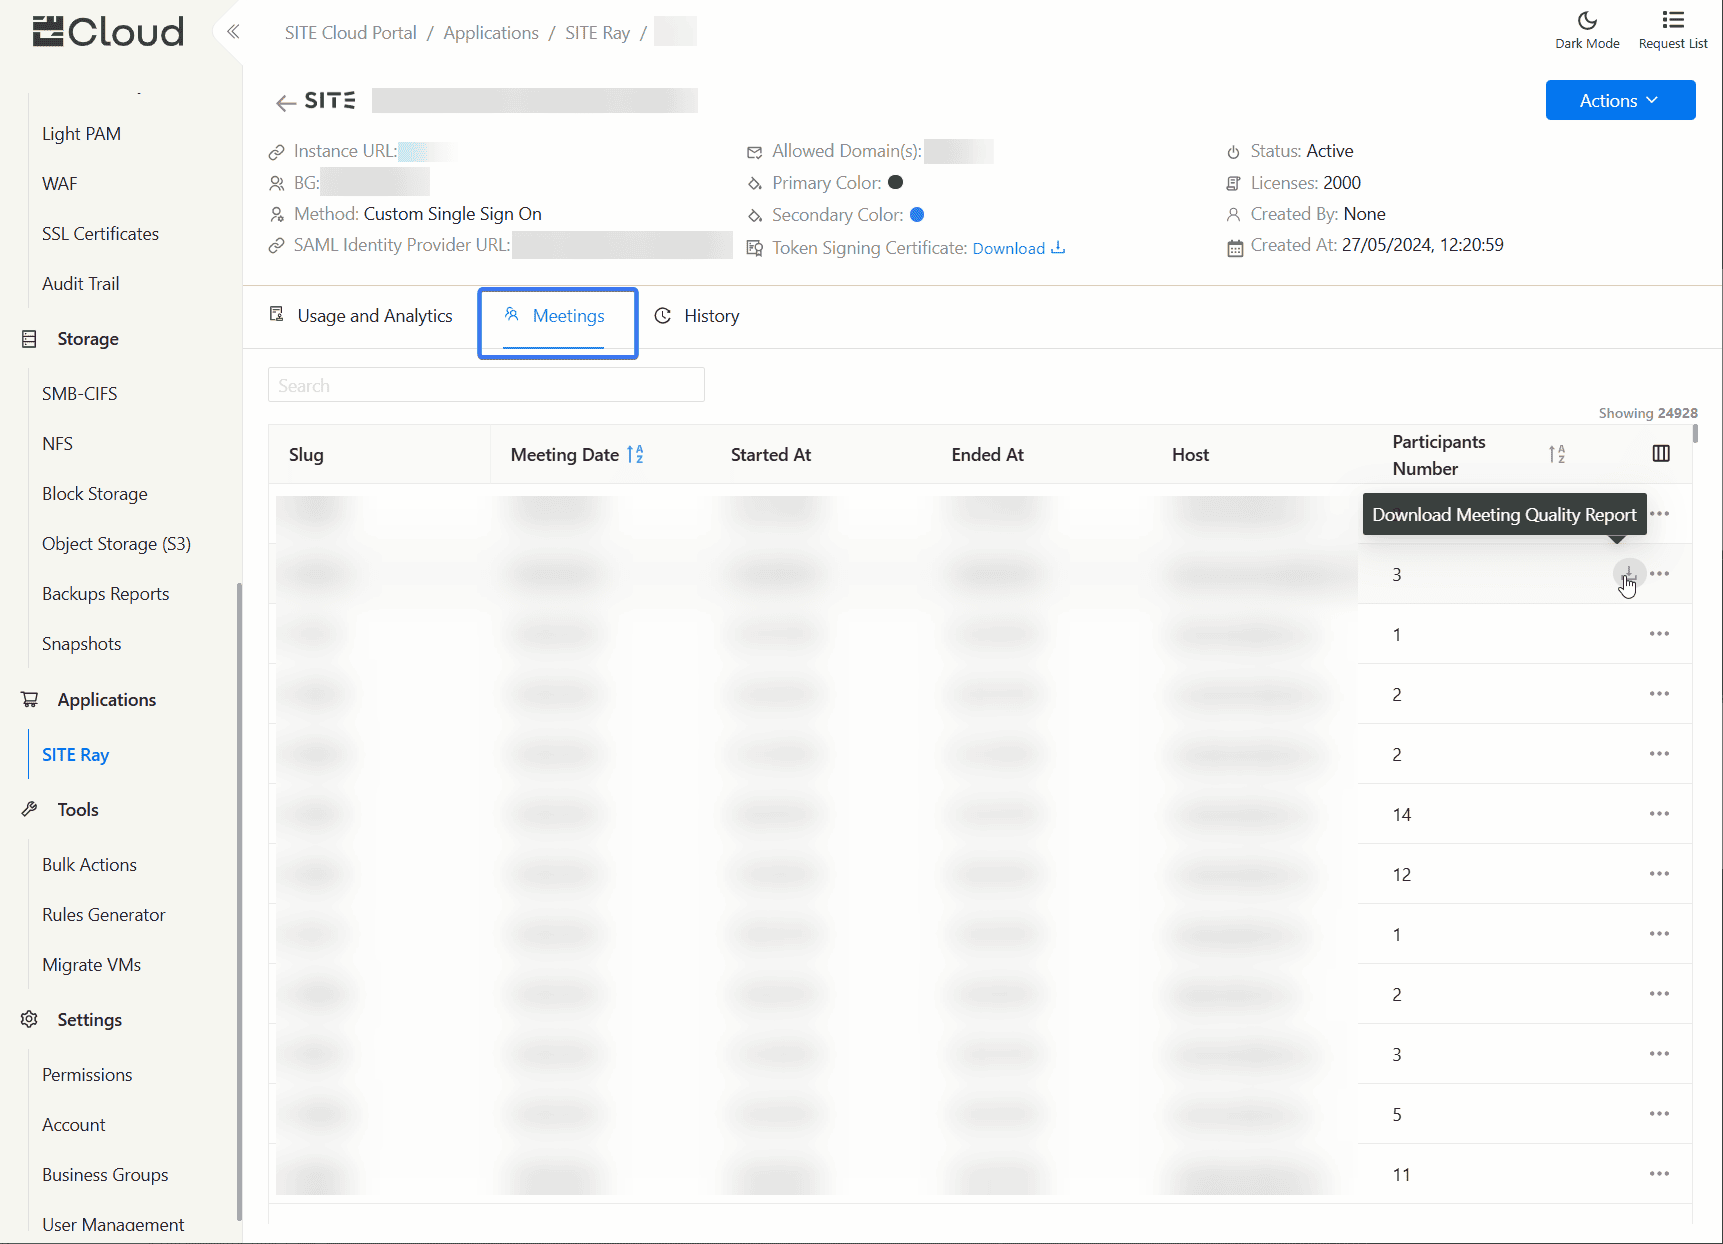
4.2 Meetings Tab: Displays a detailed log of ended meetings for the selected instance. This log includes essential information such as the Slug, Meeting Date, Started At, Ended At, Host, and Participants Number. This detailed view provides users with valuable insights into past meetings, allowing for efficient tracking and management of meeting activities within the instance.
In addition, after meetings end, users can download the meeting quality report in PDF format. Enabling users to troubleshoot meeting and participants issues.
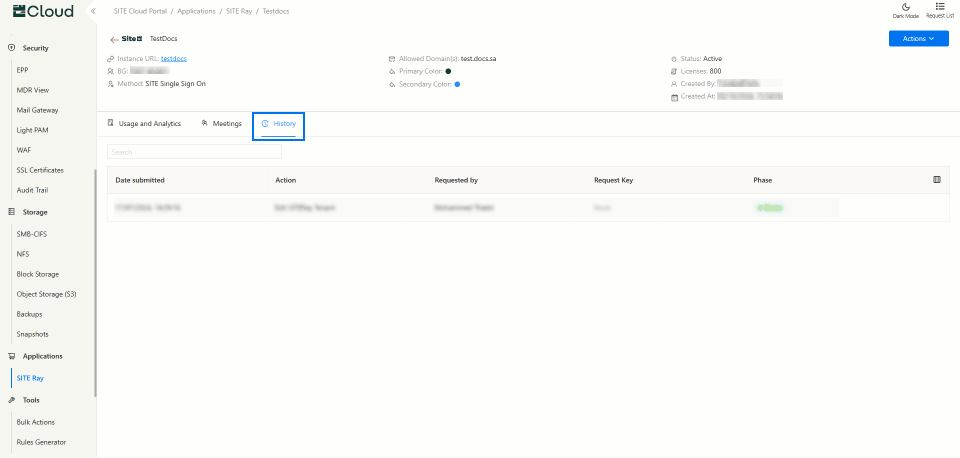
4.3 History Tab: provides a detailed record of actions taken on the instance. This log includes key information such as the Date of the action, the specific Action performed, the Requested By (the user who initiated the action), the Request Key (any associated ID), and whether the action has been Completed or is still Pending. This comprehensive history allows users to track changes and updates made to the instance, enhancing transparency and accountability.
5. Action Buttons on the far right of the instance, you will find three dots representing the action buttons, which offer the following options:
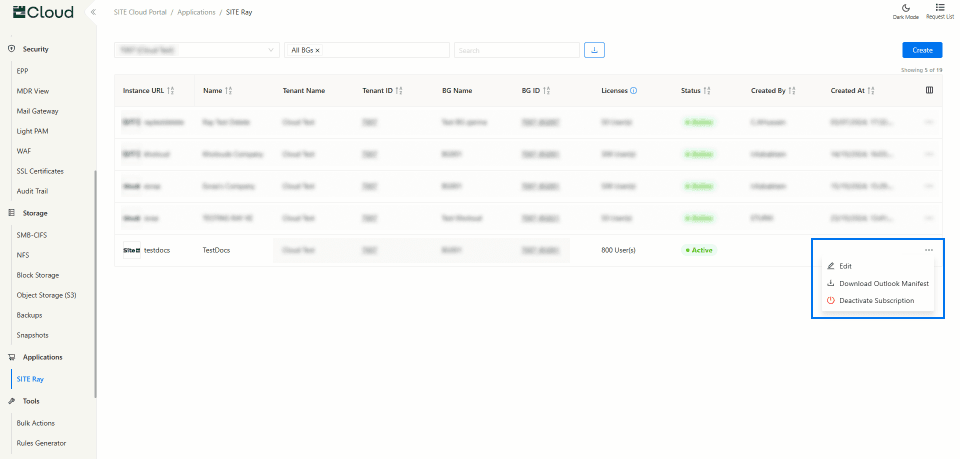
5.1 Edit: Allows modifications to the instance Name, URL, license, Method, Allowed Domains, and Customizations, enabling quick adjustments as needs evolve.
5.2 Download Outlook Manifest: button to download an XML file to integrate the instance with Microsoft Outlook, streamlining access to instance features directly within the email interface.
5.3 Activate/Deactivate: button to toggle the instance’s operational status, granting flexibility to enable or disable access as needed without affecting stored settings or data.