


Virtual Machine
Definition
A virtual machine (VM) is a digital version of a physical computer, and fundamentally a virtualization emulation of a computer system. VMs can run programs and operating systems, store data, connect to networks, and do other computing functions. VMs offer several advantages over physical machines, they are more scalable, flexible, and easy to manage and maintain.
Built in Add-ons:
- Encryption at Rest: Protects stored data by encrypting it when not in use, ensuring security even if unauthorized access occurs.
- Hardening: Secures VMs by disabling unnecessary services, closing ports, and applying security patches to reduce vulnerabilities.
- EDR (Endpoint Detection and Response): Detects and responds to suspicious activities, enabling quick analysis and threat resolution.
- EPP (Endpoint Protection Platform): Prevents threats like malware and ransomware with continuous monitoring and real-time protection.
Note: The above are sample of many add-ons, and they are not limited to these examples.
Prerequisites:
- Business group
- Environment
- Subnet
Step-by-Step Guide
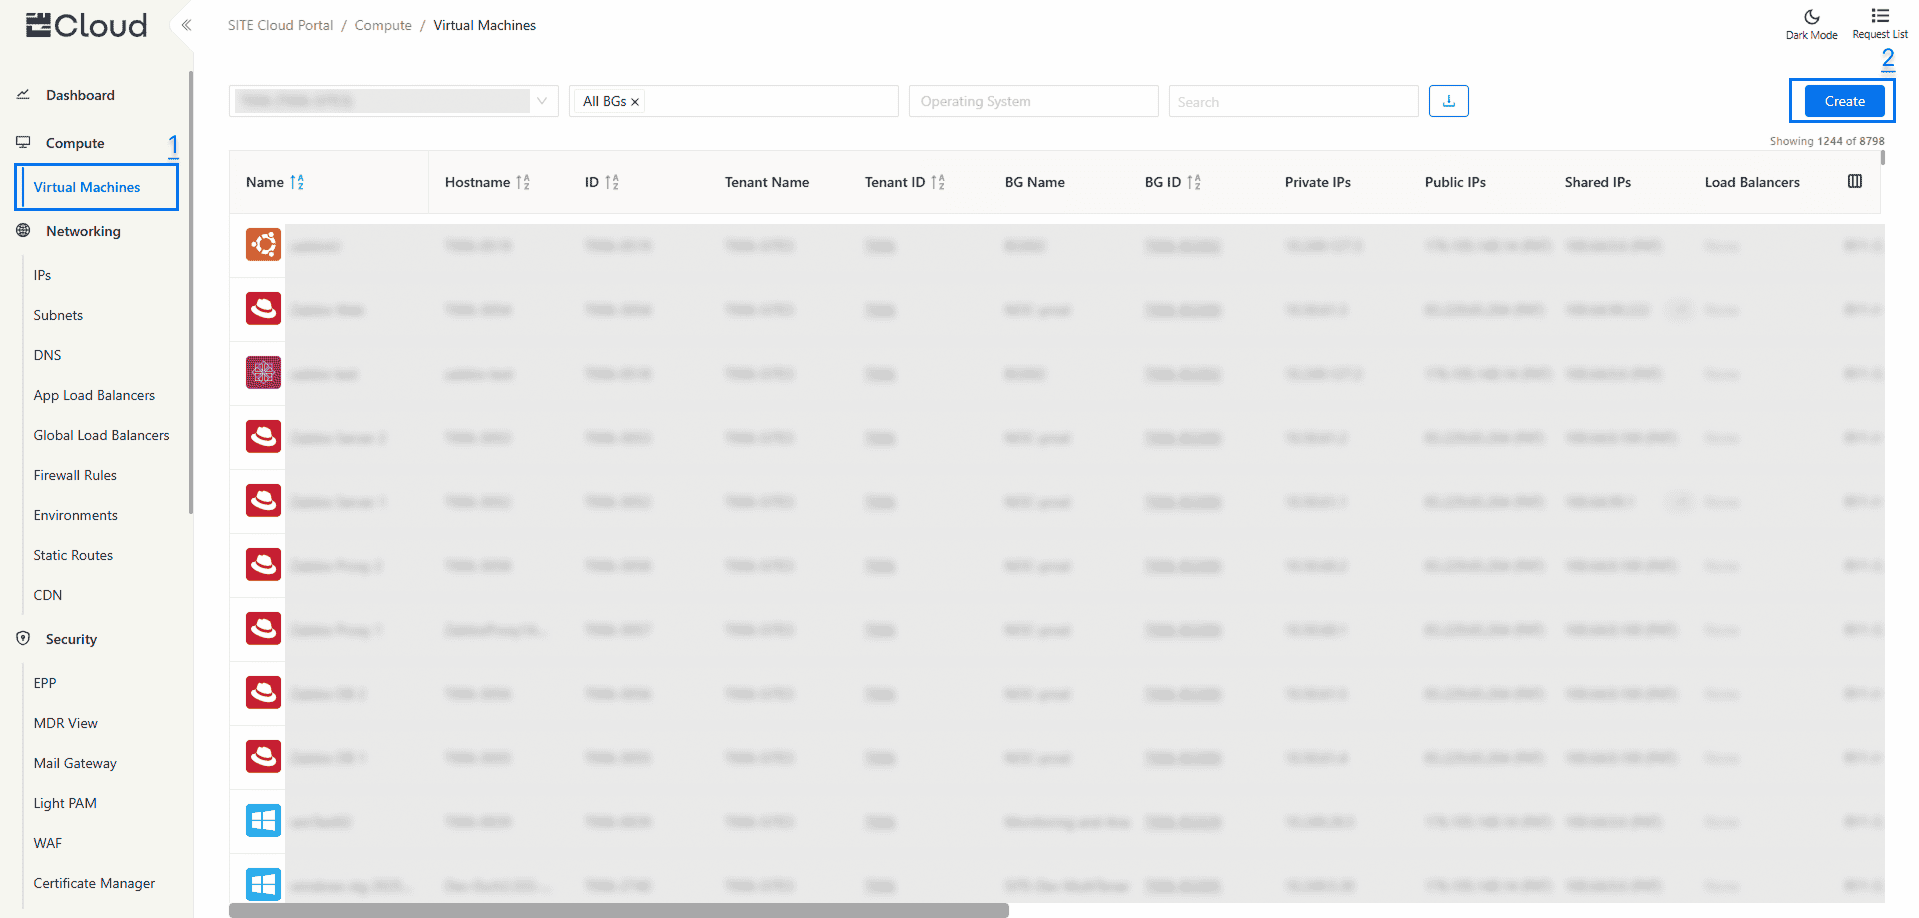
1- Navigation to Virtual Machines
- Access Through Compute Section: On the side menu, through Compute section select “Virtual Machine”
2- Create A Virtual Machine
- Click on "Create" to create a new VM
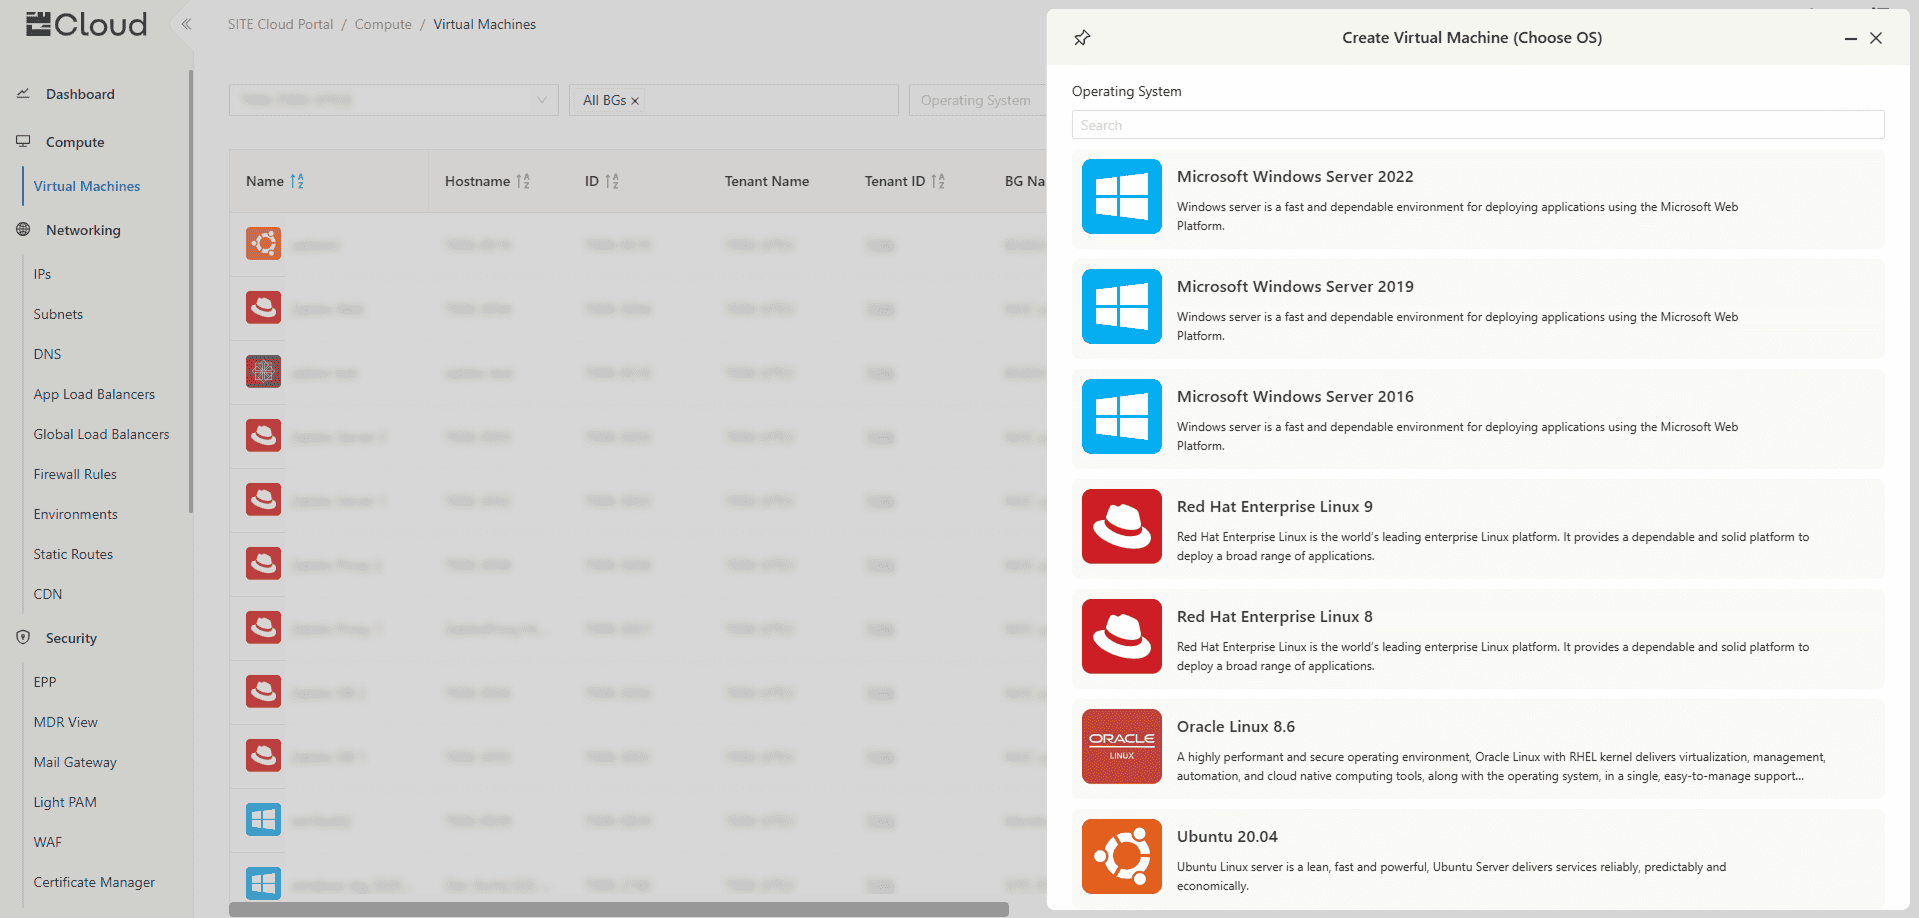
- Operating System: Choose the OS of the VM from the Available options
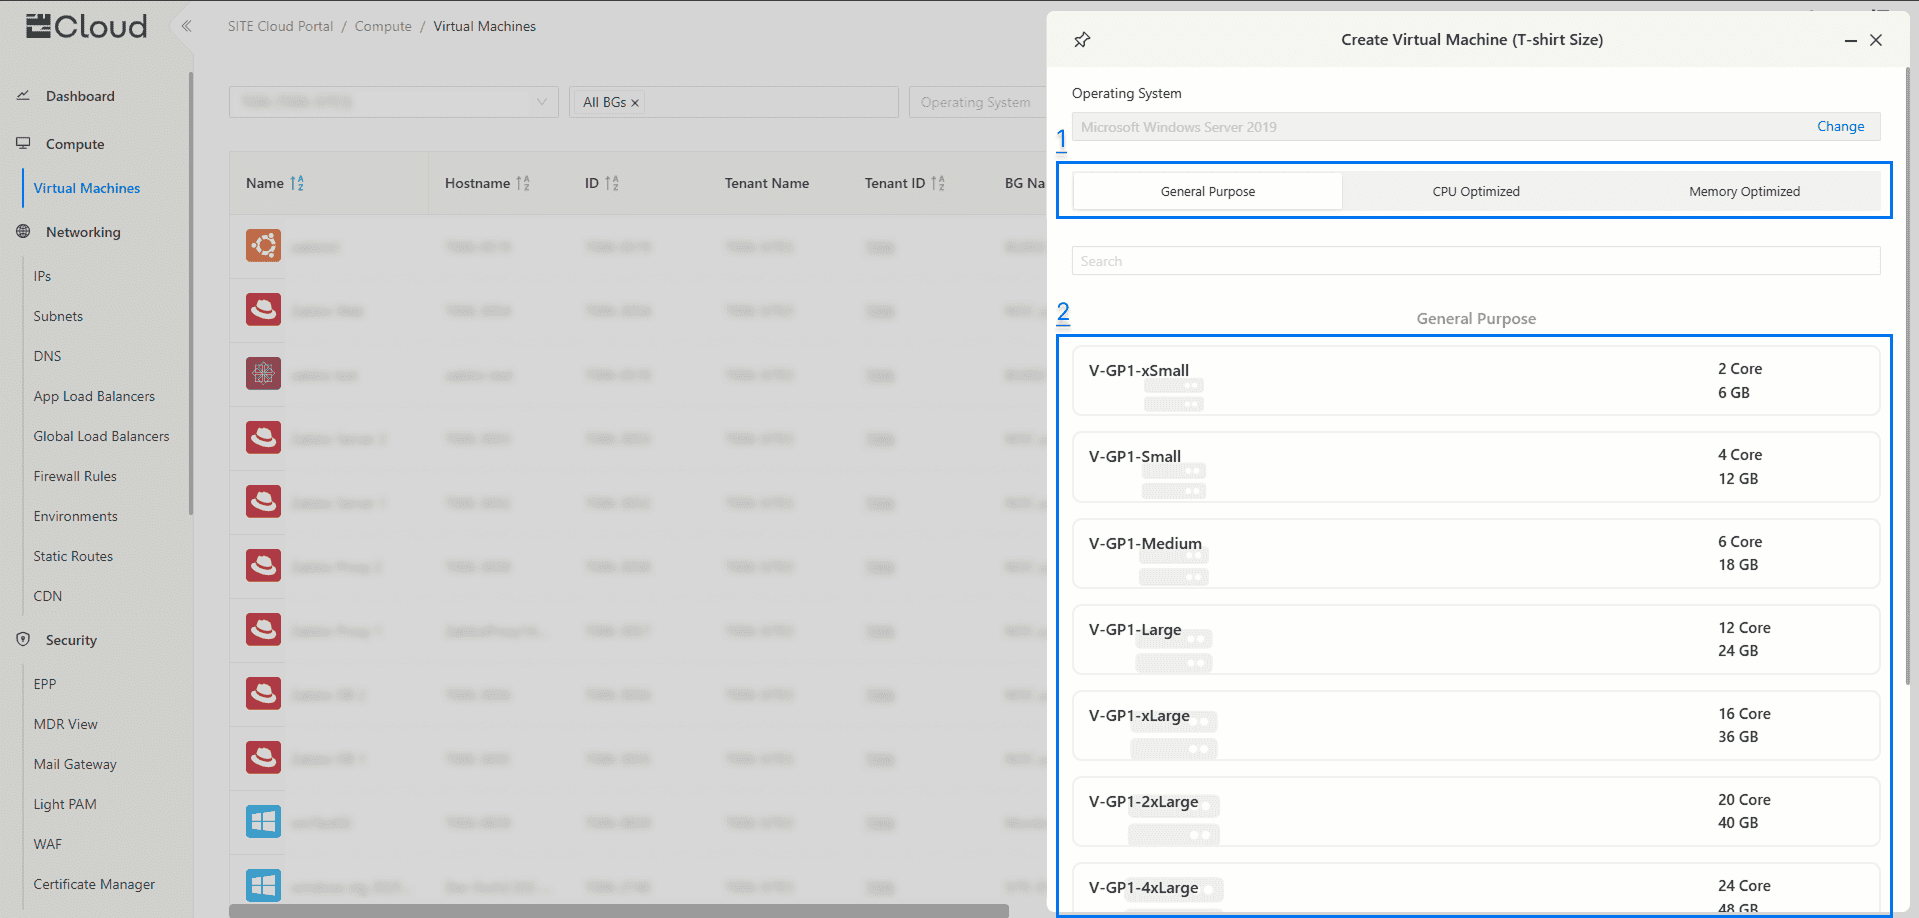
- VM Type: Choose the type of the VM (General Purpose, CPU Optimizes, Memory Optimized, or GPU Optimized)
- T-Shirt Size: Choose the CPU and Memory size from the available pre-defined sizes.
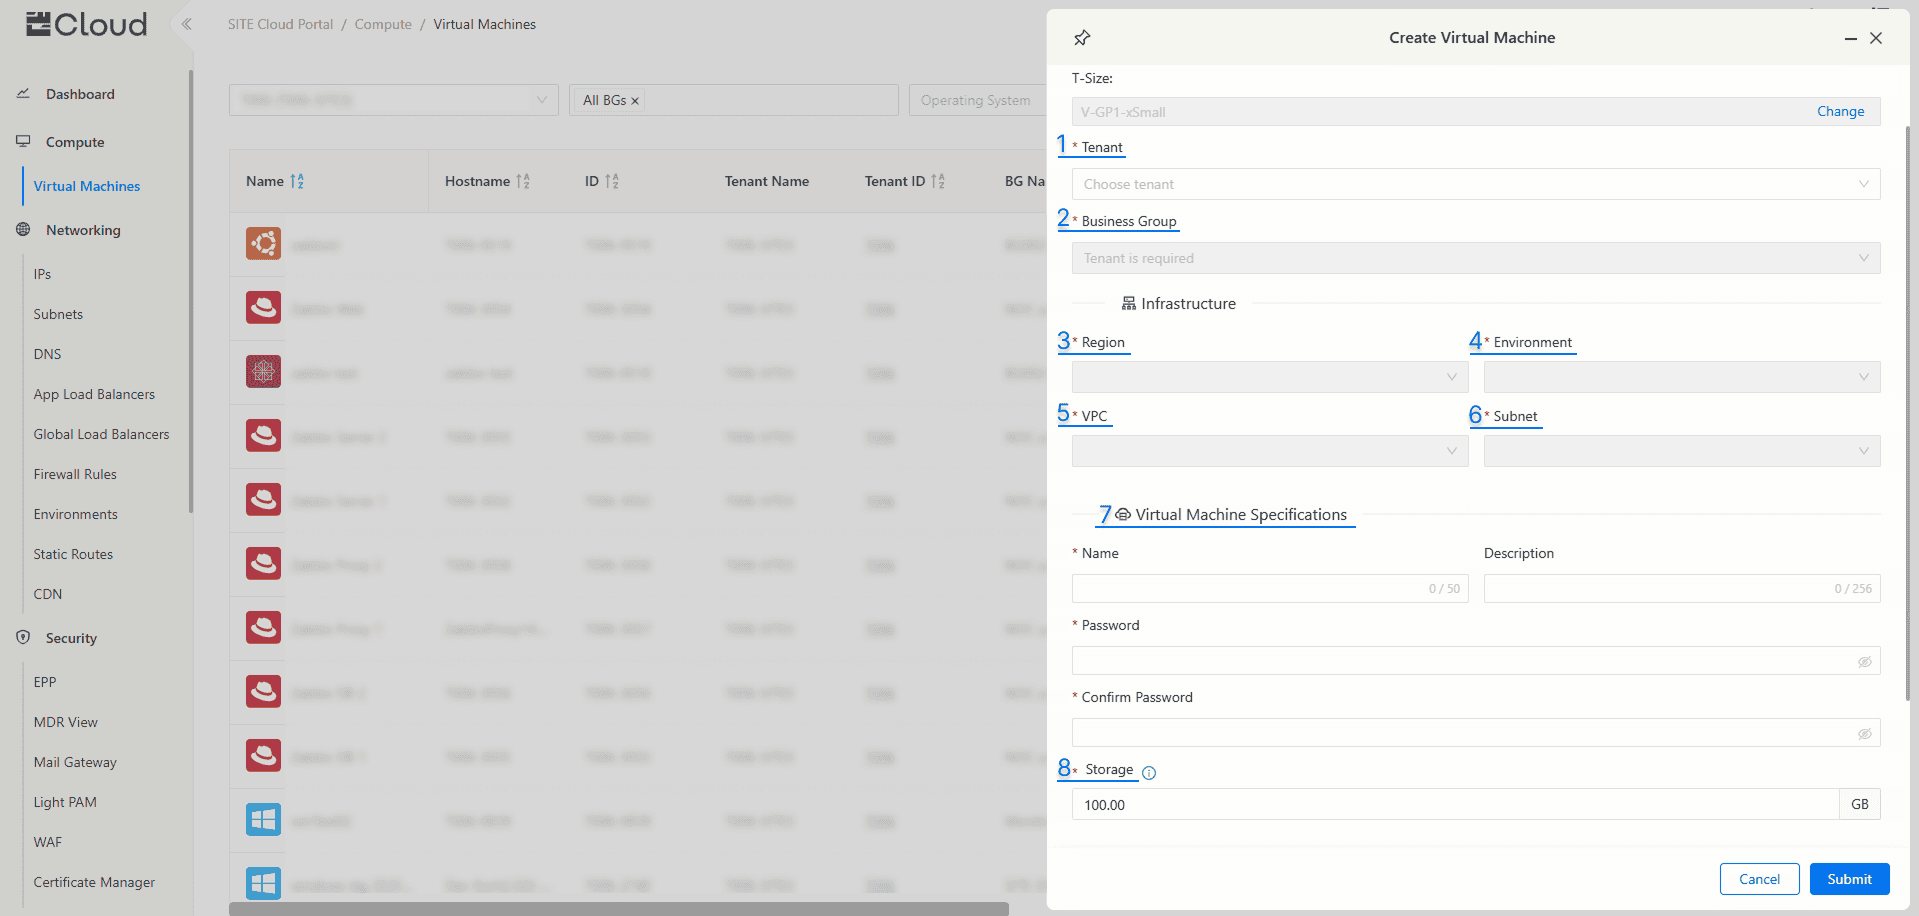
Fill in the required Virtual Machine details:
- Tenant
- Business Group (BG): BGs are used for managing your environment, it can be used to organize VMs and subnets based on uses, projects, etc..
- Region: Choose the location (Riyadh, or Jeddah).
- Environment: Choose the proffered Environment.
- VPC: There are two zones, High Security Assurance (HSA), and Standard. Security Assurance (SSA). HSA is highly secured and cannot have access to or from the internet, and SSA can have internet access.
- Subnet: chooses the preferred subnet from the available subnets in the chosen BG and environment.
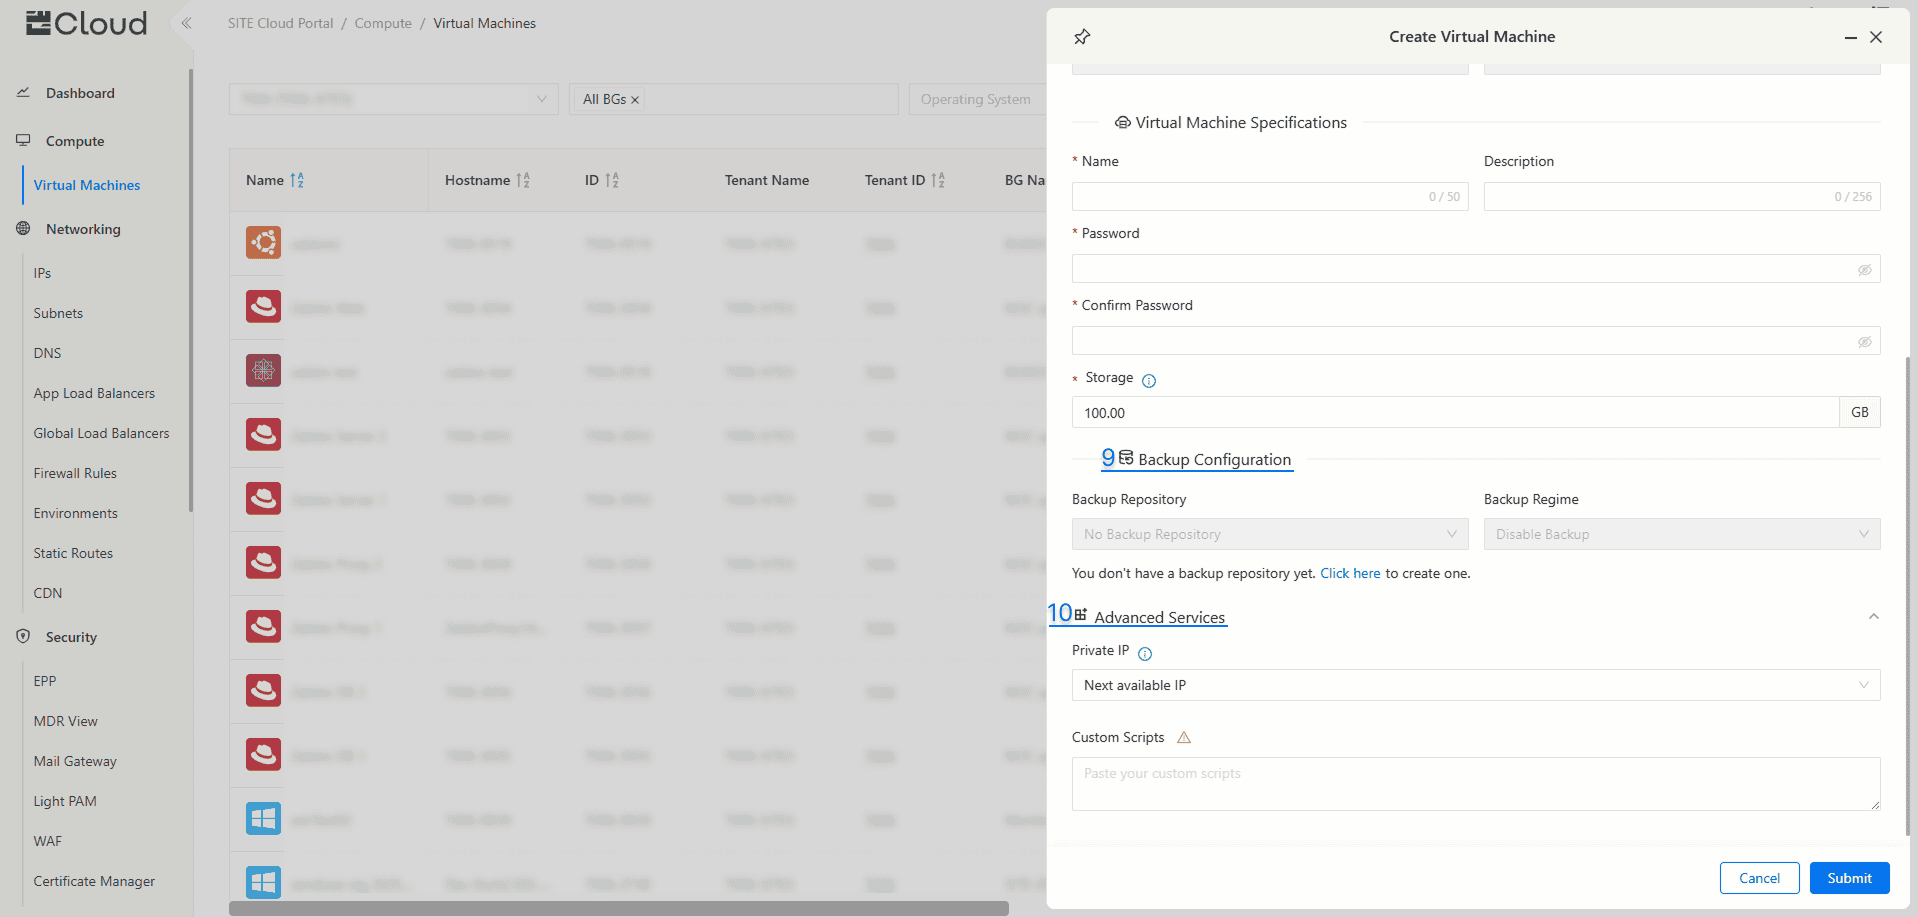
- Virtual Machine Specifications: Fill in the new VM name and password (Complexity requirements can be found once you click on password field).
- Storage: Select the preferred capacity of the VM's main storage/disk, additional storage/disks can be added after the VM gets created.
- Backup Configuration: Choose “Backup Repository” to store your backup in with your preferred “Backup Regime”.
- Advanced Options:
- Specifying Private IP: You can select specific private IP for this Virtual Machine or use the next available IP.
- Custom Scripts (Optional): You can add custom scripts that will directly execute after VM creation (either using Bash or PowerShell). DISCLAIMER: You are fully responsible for the scripts you want to execute, which may or may not cause an issue with the virtual machine.
Press "Submit" to start creating a Virtual Machine
- To view the progress of your request, click on “Request List” in the top right corner. Once the creation request is completed, your new virtual machine will appear in the “Virtual Machine” tab
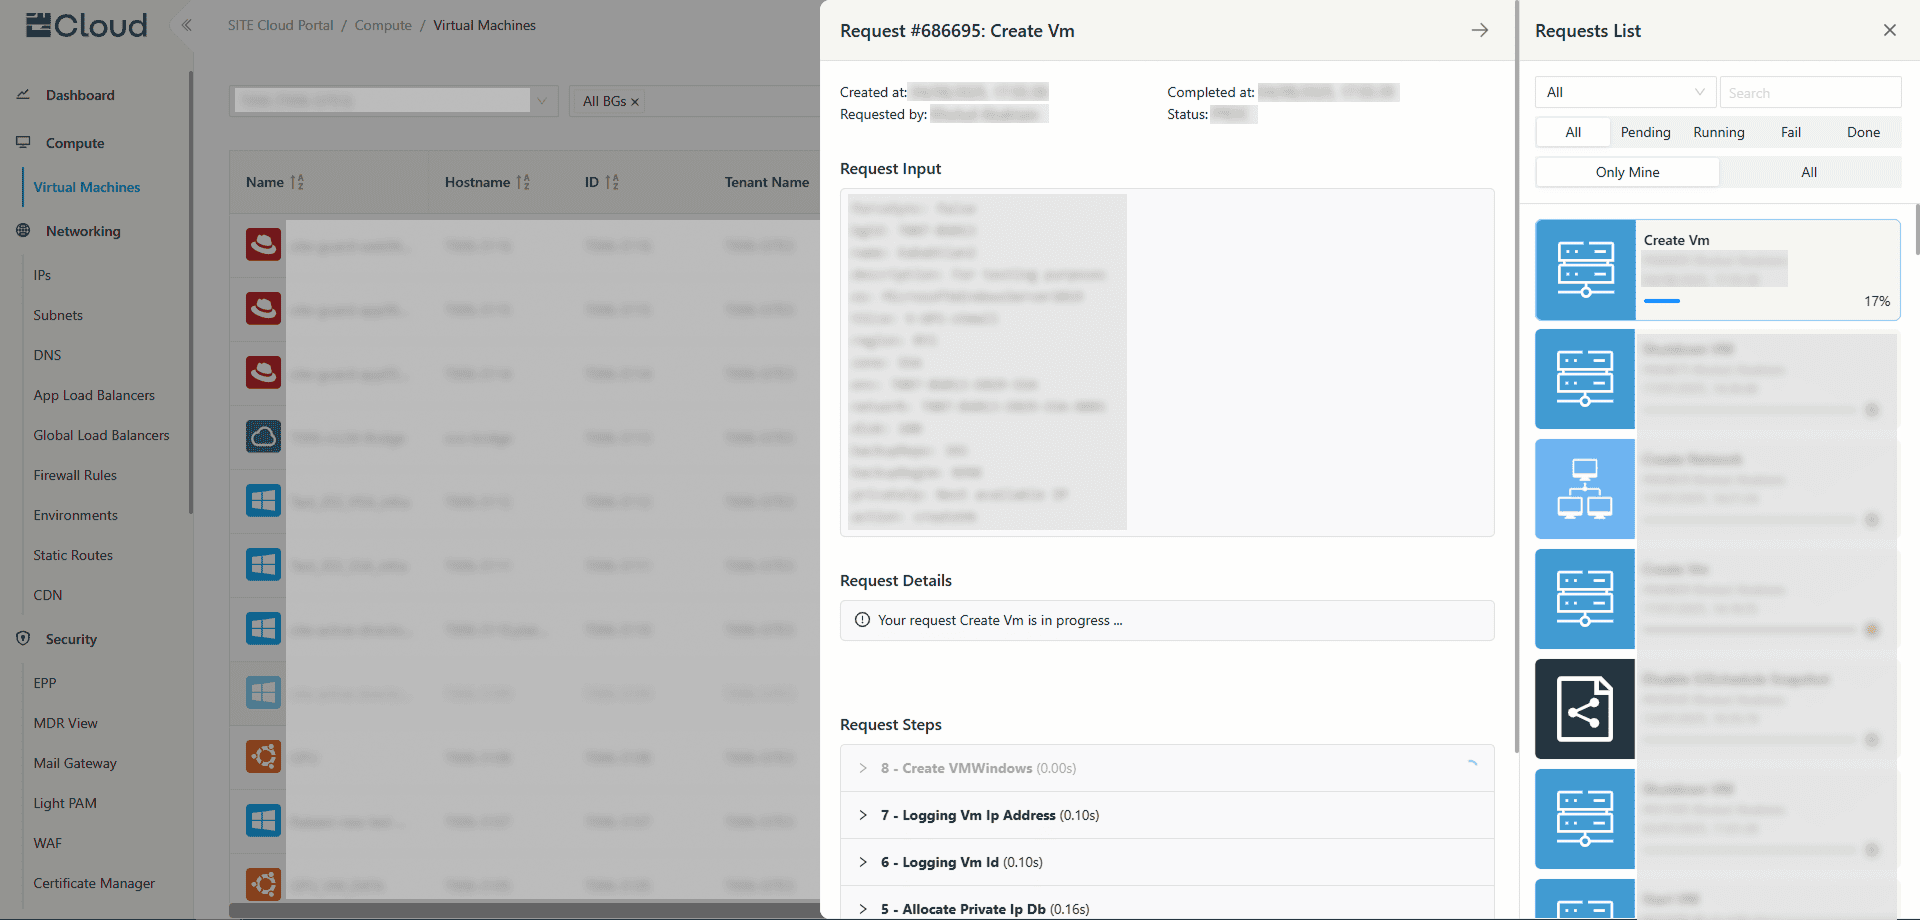
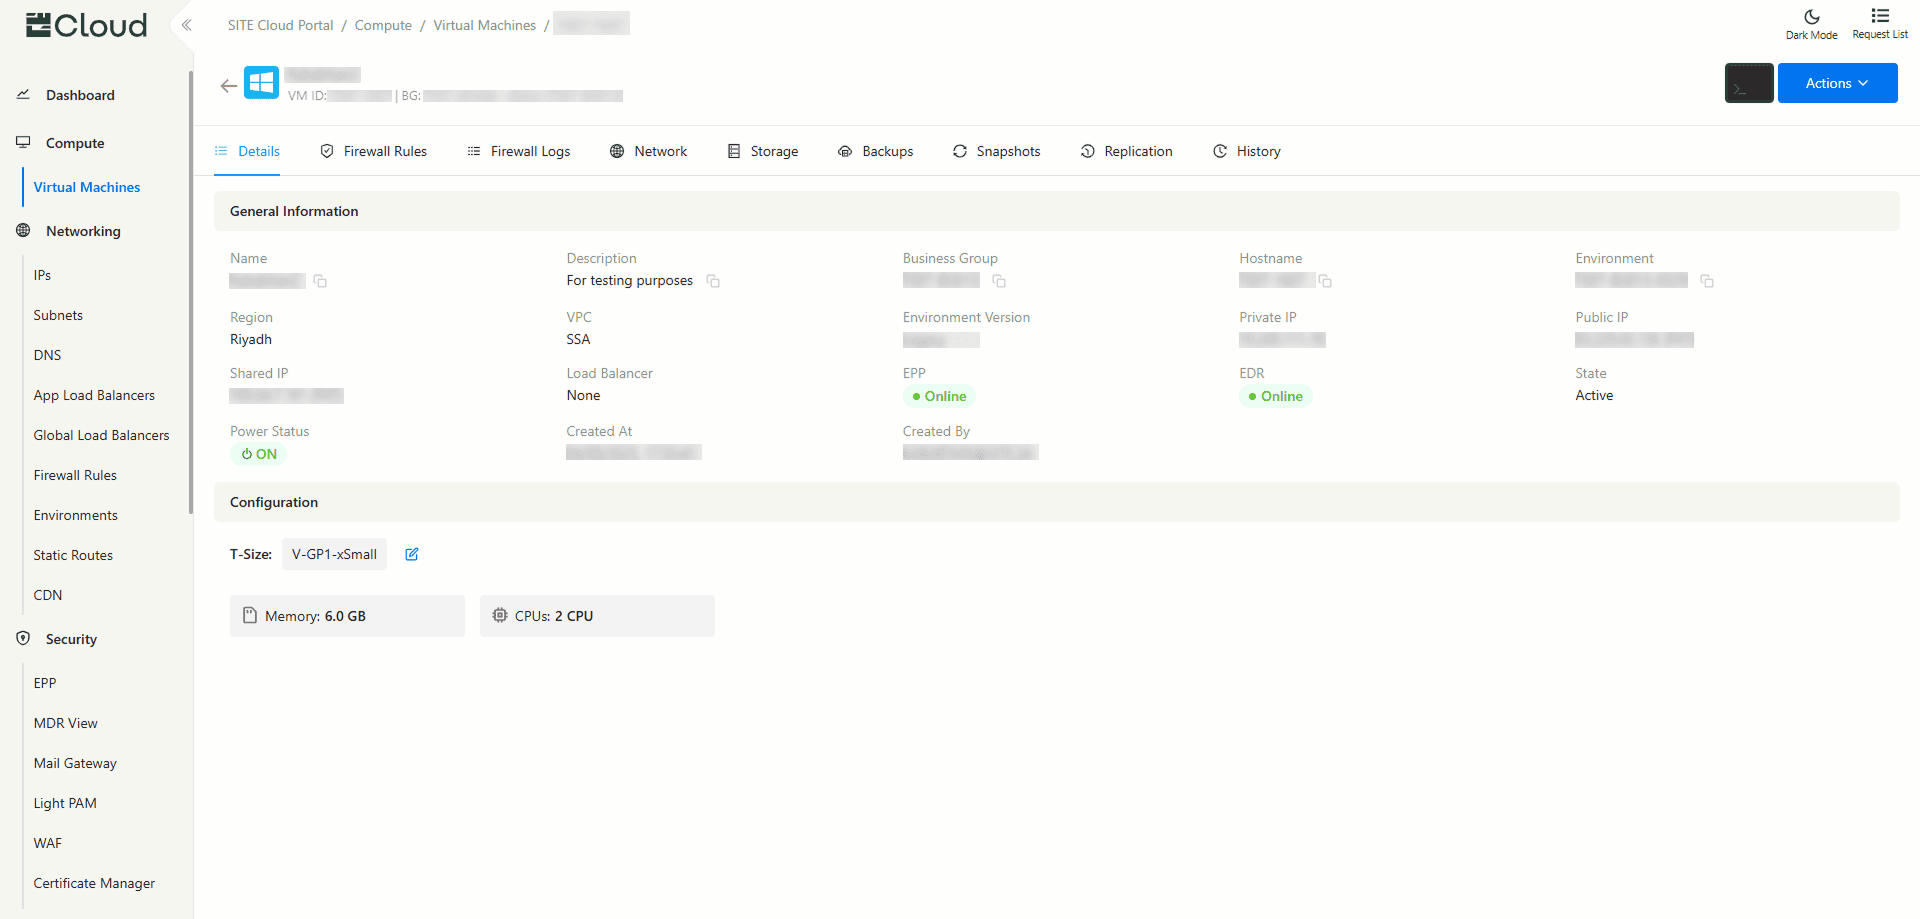
- After the VM has been created, you can click on it to view its details.
3- Access your VM
You have three approaches to access your VM:
1- Direct Link is a physical cable connection from your Organization directly to your VM, providing the safest way to access your VM
2- Light PAM is the recommended approach, as it provides a safer way to access your VM through a Jump Server, If you need a step-by step guide, click the following link: Light PAM
3- Access Through Public IP is not recommended as it poses a security risk, allowing access to your VM through the internet. If you still want to proceed and need a step-by-step guide, click the following link: How to Assign IPs from Cloud Portal
3.1- Access Through Public IP
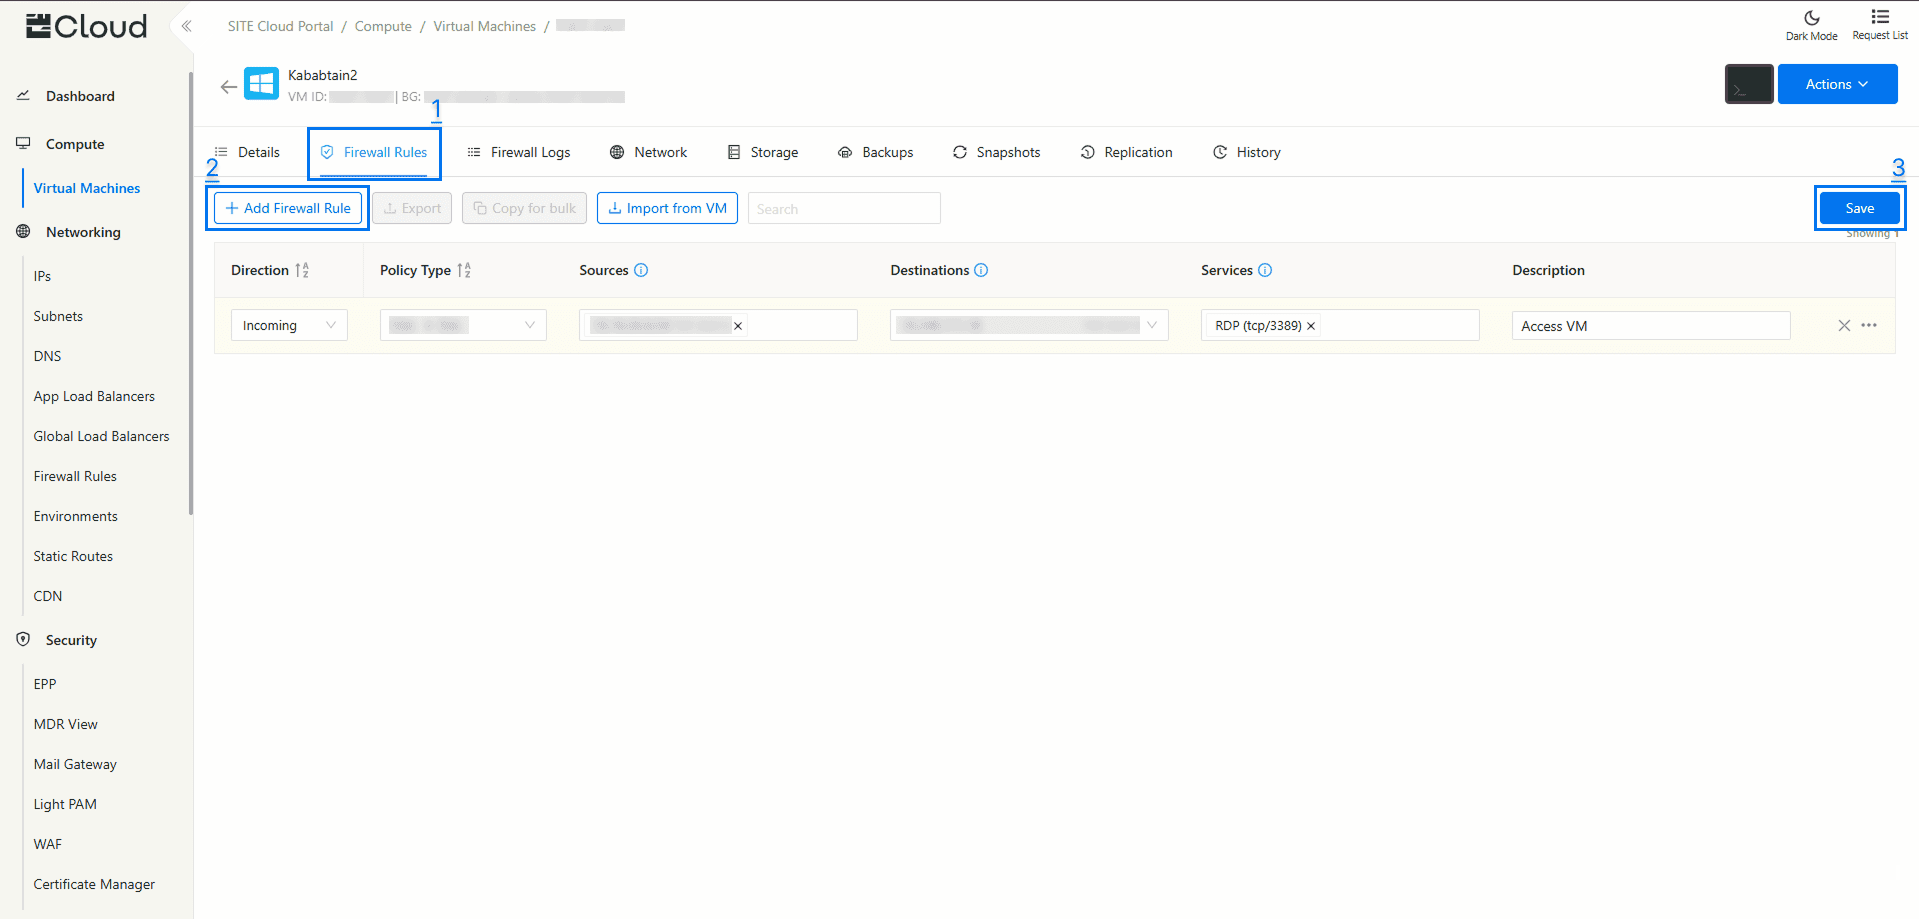
- Firewall Rule: Make sure you have the necessary firewall rule set up, because firewall rules have a default of denying access until given a rule to access.
- For More Info click the following guide: Firewall Rules
- Incoming traffic
- RDP (tcp/3389) for remote desktop access
3.1.1 - If your VM is operating in Windows OS
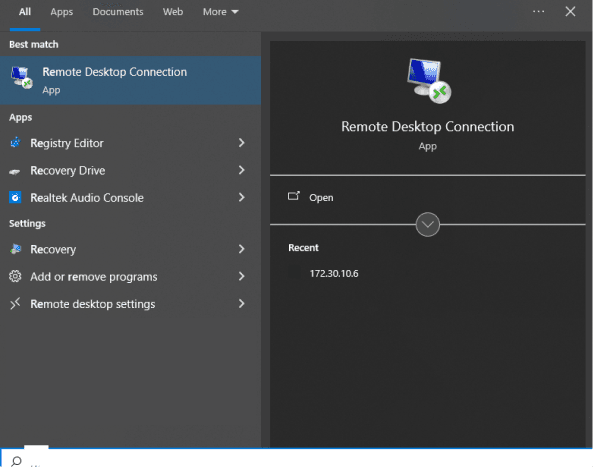
- Go to “Remote Desktop Connection” on you computer
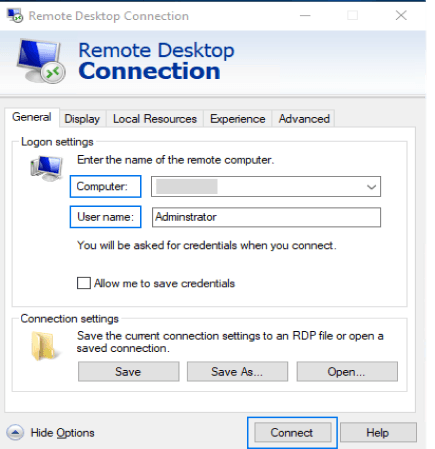
- For Computer, type your VM public IP
- For User Name, type “Administrator”
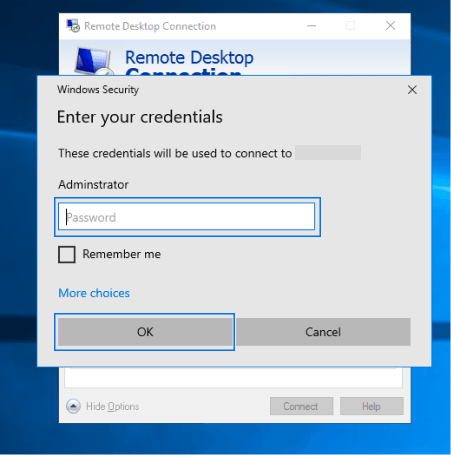
- Last step, input the same password for the VM that you set during its creation
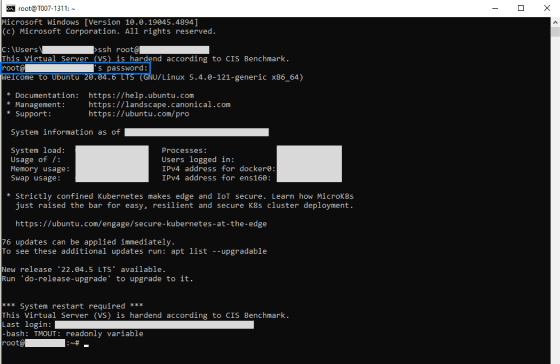
3.1.2 - If your VM operates in an open source operating systems
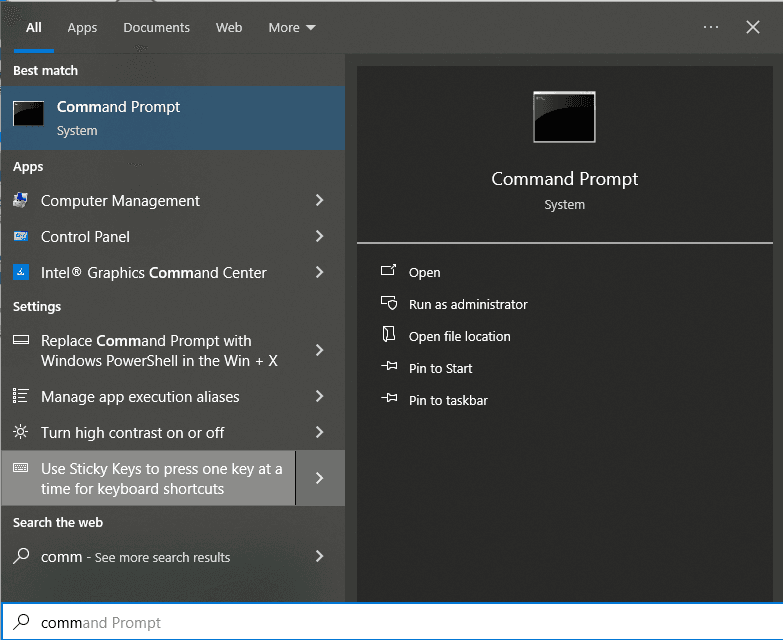
- Go to “Command Prompt (Terminal)” on you computer
- Create a firewall rule as follows, Incoming, NET → SSA, Destination (you VM's public IP), SSH protocol.
- Type the following command:
ssh root@"your public IP"
and press Enter. - Next, enter your VM password and press Enter again to log in to your VM
3.2.1 - Access through a direct link
You have to create a firewall rule as follows, Incoming, MAN → SSA, Destination (you VM's private IP), SSH protocol.
- for Windows OS access through “Remote Connect Desktop” by you VM private IP (Point 3.1.1)
- for open source OS access through “Command Prompt” by your VM private IP (Point 3.1.2)